The CMP supports several ways to work with multiple languages.
Setting the display language for a CMP
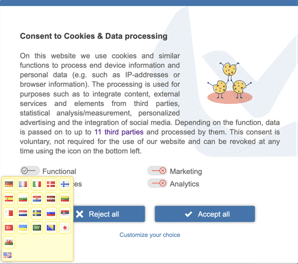
By default the CMP will display the consent message to the user in one of the supported languages. This is based on the language that is set in the visitor’s browser. If the browser language does not match one of the supported languages, the system will fall back to the default language set in the CMP. In addition, the visitor will always have the possibility to change the displayed language by clicking the flag icon in the lower left corner of the consent layer:
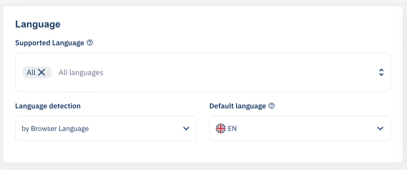
All language-related options are configured from a single block. In order to set up the languages for your CMP please follow these steps:
- Click on CMPs and edit the CMP you want to configure. Stay on the General tab
- Scroll down to the Language block
- Under Supported Language, select the languages you want to make available to visitors. The list includes both system languages and any custom languages defined in your account
- Set Default language to the language the system should fall back to when no other match is found
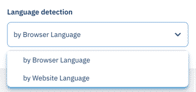
- Under Language detection, choose how the system should detect the visitor’s language: by Browser Language (default) or by Website Language. See How language detection works for details
- Save the changes
How language detection works
In the Language detection setting you have two options for how the CMP should detect the user’s language: by browser language (default) or by website language.
Language detection by browser language
In order to find the best language for the user, the system will check the browser language (languages that are set in the browser to be preferred for websites). The system will then check which of the languages match the supported languages that are set in your CMP. E.g. lets assume the following browser settings:
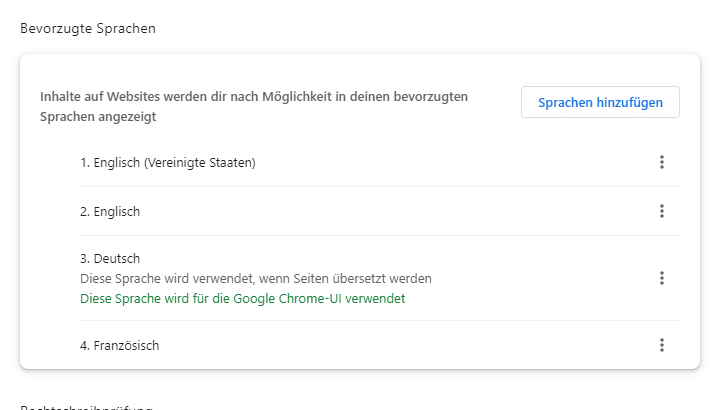
The browser will send to the website, that it prefers EN-US, alternative EN, alternative DE and alternative FR. The system will compare it to the CMP settings. For this example, lets assume the following CMP settings:
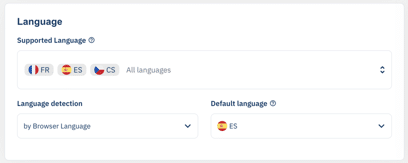
As a result, the system will choose to display the texts in FR since it is the only language that matches. If FR and DE would be in the CMPs supported languages, the system would display the consent banner in DE. If no language can be found, the default language (here ES) will be used.
Language detection by website language
If this setting is enabled, the system will follow the same logic as described above, but will not use the browser’s language and instead search in the website information for a suitable language. This is done by analyzing the <html> element and the page URL in the following order:
- If
<html xml:lang="xx">is present, this will be taken and compared to the CMP languages. No other checks (2, 3, 4) will be done. When using locales the language code must be first, followed by the country code (e.g.pt-BR). The system will also match non-locales with locales (e.g.xml:lang="pt-br"will match with language “pt”) - If
<html lang="xx">is present, this will be taken and compared to the CMP languages. No other checks (3, 4) will be done. When using locales the language code must be first, followed by the country code (e.g.pt-BR). The system will also match non-locales with locales (e.g.lang="pt-br"will match with language “pt”) - The first part (subdomain) of the hostname will be taken and analyzed. If
xx.domain.comis present and matches one of the CMP languages it will be taken and no other checks (4) will be done. When using locales, the system will check for both orders (e.g.pt-br.domain.comandbr-pt.domain.com) - The path will be taken and analyzed. Possible matches are
domain.com/xx/...,domain.com/xx-yy/...,domain.com/xx/yy/...,domain.com/yy-xx/...anddomain.com/yy/xx/...(wherexxis the language code andyythe locale)
Setting the translation for a text
In order to change the texts that are displayed in the consent layer please login to your account and follow these steps:
- Click on Designs and select the design you want to edit
- The design view shows the Settings, Preview and Text sections side by side. Under Text you will find all the strings for each language and each selected legislation, including custom texts
- Change the texts and save the changes
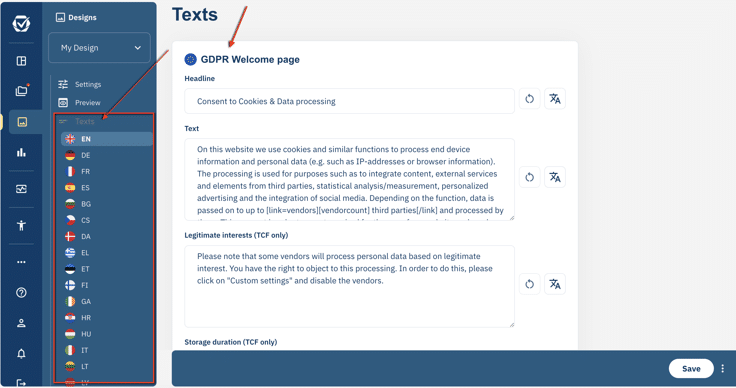
Please note: If you set the translation to a text to an empty string, the system will insert the default text again. If you do not want to display a certain text, please use the space sign.
Setting the translation for a custom purpose
For each custom purpose created in your account you will find a field in the Texts section inside the purpose settings, where you can translate the name and the description of the custom purpose into other languages. For all untranslated languages, the system will use the original name and description.
In order to translate a custom purpose please follow these steps:
- Click on CMPs > Purposes and select the custom purpose you want to edit. Custom purposes are identified by a
cprefix (e.g.c1,c2, …cXY) - Under Name translations and Description translations you will find the default text (marked as ALL) and the option to add custom strings by clicking the + button
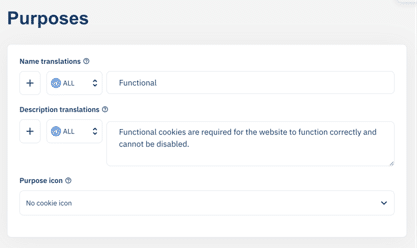
- To add a translation manually, click the + button next to the name or description and select the language locale you want from the dropdown. The list includes both system languages and any custom languages defined in your account
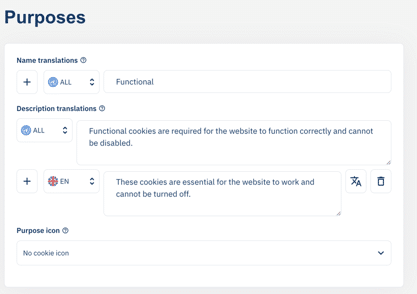
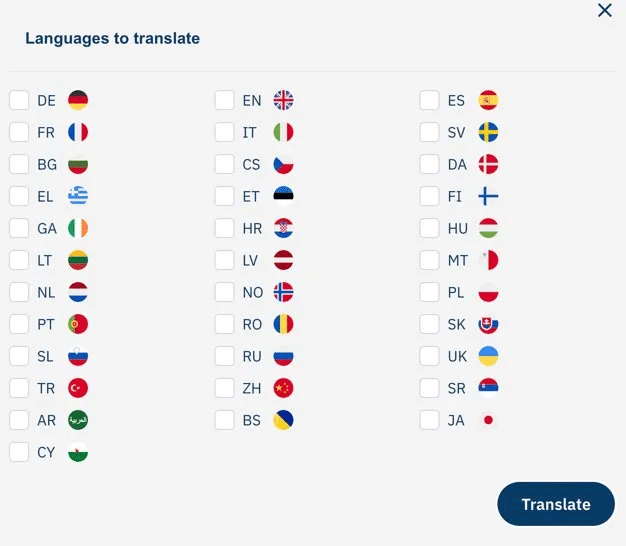
- To translate a string into multiple languages at once, click the translate icon next to the string. In the Languages to translate dialog, select all the languages you want and click Translate
- Save the changes
Please note: If you set a translation to an empty string, the system will fall back to the original name and description for that language.
Setting the translation for a vendor
For each vendor enabled in your CMP you will find a field in the Texts section inside the vendor settings, where you can translate the name and the description of the vendor into other languages. For all untranslated languages, the system will use the original name and description provided by the vendor.
In order to translate a system vendor please follow these steps:
- Click on CMPs > Vendors and select the system vendor you want to edit
- Under Description translations you will find the default text for all the available languages and the option to add custom strings by clicking the + button
- To add a translation manually, click the + button next to the flag and select the language locale you want from the dropdown. The list includes both system languages and any custom languages defined in your account
- Save the changes
Important: The system vendors cannot be automatically translated into an unsupported language; therefore, the translation needs to be done manually.
Please note: If you set a translation to an empty string, the system will fall back to the original name and description for that language.
Setting privacy page based on language
In order to direct the visitor to the privacy page in his or her language please follow these steps:
- Click on CMPs and edit the CMP you want to configure
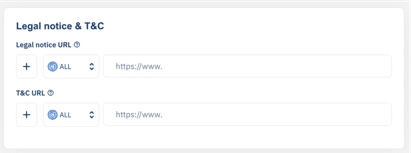
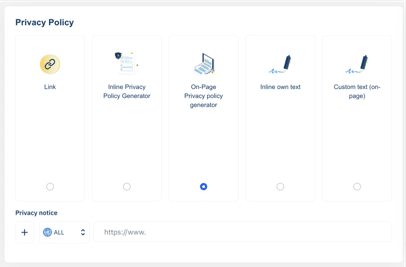
- Go to the Privacy Policy tab. Here you can configure three localizable URLs: Legal notice URL, T&C URL and Privacy notice
- For each field, the default URL is marked as ALL and will be used for any language without a specific override
- To add a localized URL, click the + button next to the field and select the language locale you want from the dropdown. The list includes both system languages and any custom languages defined in your account
- To translate a URL into multiple languages at once, click the translate icon next to the field and select the languages from the Languages to translate dialog (same workflow as for custom purposes)
- Save the changes
Supported languages
The following languages are currently supported in the system:
- English (EN)
- German (DE)
- French (FR)
- Spanish (ES)
- Bulgarian (BG)
- Czech (CS)
- Danish (DA)
- Greek (EL)
- Estonian (ET)
- Finnish (FI)
- Irish (GA)
- Croatian (HR)
- Hungarian (HU)
- Italian (IT)
- Lithuanian (LT)
- Latvian (LV)
- Maltese (MT)
- Dutch (NL)
- Norwegian (NO)
- Polish (PL)
- Portuguese (PT)
- Romanian (RO)
- Slovak (SK)
- Slovenian (SL)
- Swedish (SV)
- Russian (RU)
- Serbian (SR)
- Chinese, simplified (ZH)
- Turkish (TR)
- Ukrainian (UK)
- Arabic (AR)
- Bosnian (BS)
Creating custom languages
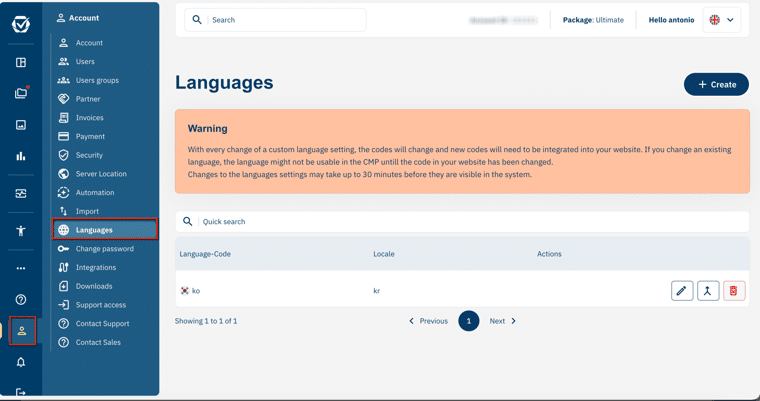
In order to work with languages that are not (yet) supported by the system, you can create your own custom languages under Account > Languages. Custom languages consist of a language code (ISO 639-1, 2 letter code) and an optional locale (country code, ISO 3166-1 alpha-2). Once a new language is created, it will take up to 30 minutes until the language is visible in your system. Custom languages can be used in the same way as the system languages.