
Most of the banner’s appearance is set under Designs, without writing any code. If you need finer control than the design settings offer, you can target the banner’s HTML elements with your own CSS.
For the settings themselves, see:
Where to add your CSS
consentmanager has a field for it. Go to Designs, choose your design, then open Settings. Scroll to the bottom, past the targeting options, and you will find Custom CSS.
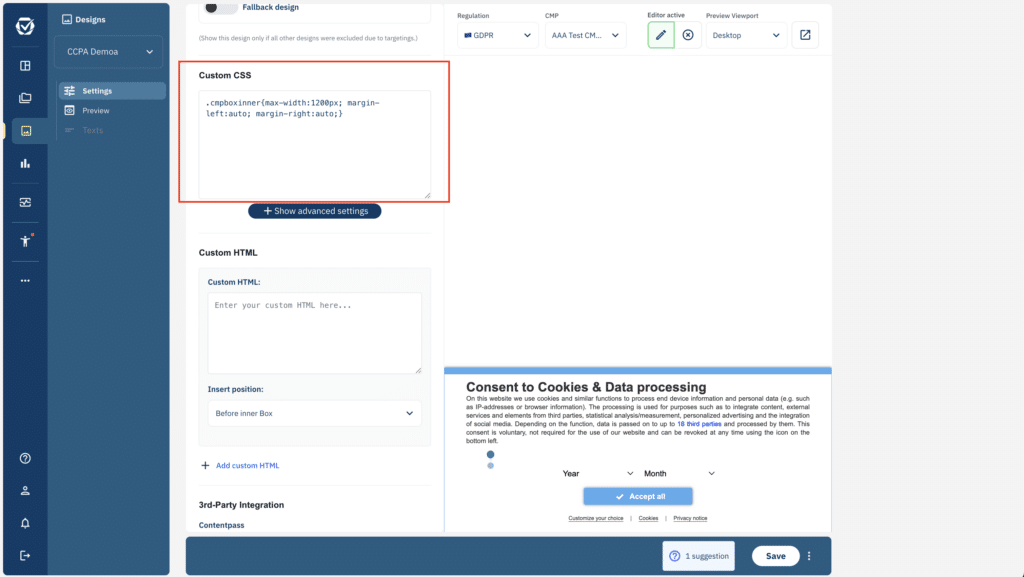
Paste your CSS into the box and click Save. It applies to that design only, and it travels with your CMP, so there is nothing to deploy on your own site.
Test before you save. Next to the Regulation and CMP selectors there is a Preview Viewport dropdown. Switch it to a phone size to see how your CSS behaves on small screens, without touching your live site.
Two settings that change how CSS behaves
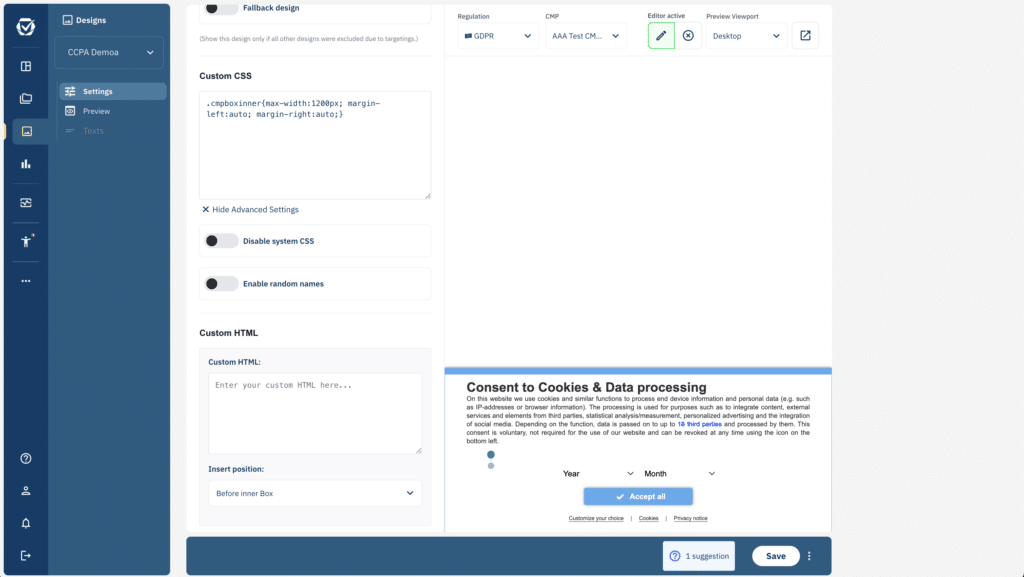
Click Show Advanced Settings beside the Custom CSS box and you will see two toggles.
| Toggle | What it does |
| Disable system CSS | Stops the CMP loading its own default stylesheet. Everything then has to come from your CSS, so the banner will look unstyled until you replace what you removed. |
| Enable random names | Randomizes the CSS class names. |
If you switch on Enable random names, your CSS will stop working. Every selector below depends on the class names staying stable. If your CSS suddenly has no effect, check this toggle first.
Custom HTML
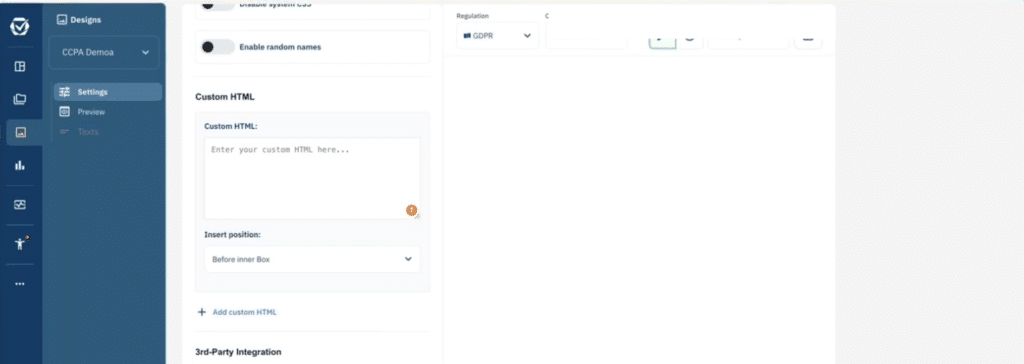
Below the CSS box is a Custom HTML field, with an Insert position dropdown that controls where your markup goes, for example before the inner box. Use Add custom HTML if you need more than one block.
Adding CSS on your own site instead
You can also style the banner from your own stylesheet. The elements are in your page like any others, so your rules apply normally.
Use the Custom CSS field when the styling belongs to the banner and should follow the CMP. Use your own stylesheet when the styling belongs to your site, for example when the banner should inherit fonts or colors you already define.
How the banner is structured
Every element the CMP renders carries a class starting with cmp, so you can find any of them with your browser’s inspector. The main ones nest like this:
#cmpwrapper | The container the CMP renders into |
.cmpbox .cmpbox0 | The banner. Appearance, plus a numbered position class |
.cmpboxinner | Inner wrapper, where width is best controlled |
.cmpboxhl | Headline |
.cmpboxtxt | Body text |
.cmpboxcontent | Content area, scrolls when the box is constrained |
.cmpboxbtns | Button row |
The second class on .cmpbox is a number reflecting the position you chose in your design settings. It sets the position and the width, which matters for the example below.
| Position class | Position and default width |
.cmpbox0 | Bottom right, 600px |
.cmpbox1 | Bottom, full width |
.cmpbox2 | Bottom center, 600px |
.cmpbox3 | Center of the screen, 600px |
.cmpbox4 | Top center, 600px |
.cmpbox5 | Top, full width |
.cmpbox6 | Right edge, full height, up to 300px |
.cmpbox7 | Left edge, full height, up to 300px |
.cmpbox8 | Inline in the page rather than fixed |
.cmpbox9 | Bottom left, 600px |
.cmpbox10 | Top left, 600px |
.cmpbox11 | Top right, 600px |
Buttons
Every button carries cmpboxbtn plus a class naming its action, so you can style them all at once or one at a time.
| Class | Button |
.cmpboxbtn | On every button |
.cmpboxbtnyes | Accept |
.cmpboxbtnno | Reject |
.cmpboxbtnsave | Save choices |
.cmpboxbtnsettings | Opens the second layer |
.cmpboxbtncustom | Custom button, if you configured one |
First layer, the welcome page
| Class | Element |
.cmpwelcomeprps | The purposes area |
.cmpwelcomeprpsbox | A single purpose block |
.cmpwelcomeprpstxt | Purpose name |
.cmpwelcomeprpsdescr | Purpose description |
.cmpwelcomeprpsvendors | Vendor count under a purpose |
.cmpmorelink | Inline “more information” link |
.cmpboxcookieicon | Cookie illustration |
.cmpclose | Close icon |
.cmplogo | Your logo |
Second layer, the custom settings page
The menu is 200px wide and the detail panel takes the rest.
| Class | Element |
.cmpboxnavi | Left-hand menu |
.cmpboxnaviitem | A menu entry |
.cmpboxnaviitemactive | The selected menu entry |
.cmpboxdetails | The detail pane beside the menu |
.cmppurposebox2 | A purpose row |
.cmppurposedescription | Purpose description |
.cmppurposetogglebox | The toggle on a purpose row |
.cmpvendorbox2 | A vendor row |
.cmpvendname | Vendor name |
.cmpvendordescr | Vendor description |
.cmpvendortogglebox | The toggle on a vendor row |
.cmpallprps | Select-all toggle for purposes |
.cmpallvend | Select-all toggle for vendors |
.cmptbl | Tables, including the cookie list |
The reopen badge
The badge that lets visitors reopen the banner after choosing carries both a class and an id, so #cmpboxrecall is available when you need the extra specificity.
| Class | Element |
.cmpboxrecall | The badge |
.cmpboxrecalllink | The link inside it |
.cmpboxrecalltxt | Its label, when the design shows one |
Changing colors
For colors you do not need to hunt for selectors. The CMP exposes eight custom properties, and overriding one changes every element that uses it.
| Property | Controls |
--clrBackground | Banner background |
--clrText | Body text |
--clrTextSecondary | Secondary and supporting text |
--clrHeadline | Headline |
--clrLink | Links |
--clrHighlight | Highlights and accents |
--clrButton | Button background |
--clrButtonText | Button label |
Example:
.cmpbox {
  --clrBackground: #0f1216;
  --clrText: #e7eaef;
  --clrButton: #1f4fd8;
  --clrButtonText: #ffffff;
}
Worked example: making the banner wider
The banner is 600px wide in most positions. To widen it, constrain the inner box and let it center itself:
.cmpboxinner {
  max-width: 1200px;
  margin-left: auto;
  margin-right: auto;
}
Paste that into Designs > your design > Settings > Custom CSS and save.
This works whatever position you picked, which is why it is the approach to use. Setting the width on .cmpbox looks more obvious but works less well:
/* Avoid: fights the position class */
.cmpbox { width: 1200px; }
.cmpbox carries the banner’s appearance, not its width. Width comes from the numbered position class, so a banner in the bottom right is .cmpbox0 and that class sets width: 600px. Constraining .cmpboxinner avoids the question entirely.
Phones are handled for you. The CMP forces the banner to full width on small screens, so a desktop width will not leak onto mobile. If you do need to change phone behavior, match the CMP’s own breakpoints and use !important, because the built-in rules use it too:
@media (max-width: 480px) and (orientation: portrait) {
  .cmpbox { max-height: 70% !important; }
}
Important
- Enable random names breaks every selector. Check it first if nothing is applying.
- Width is on the numbered position class, not
.cmpbox. - Mobile rules use
!important, so match them if you need to override phone behavior. .cmpboxanimates width and height over 0.9 seconds, so a resize eases in rather than snapping. Add.cmpbox { transition: none; }if you would rather it did not.- If a rule will not apply, raise specificity by combining classes, for example
.cmpbox.cmpbox0, before reaching for!important.