If you use Matomo cookies on your website, you may be wondering how you can integrate Matomo Analytics into your cookie banner in order to comply with GDPR requirements. In our previous guide we have already explained in detail what exactly Matomo Analytics is and how Matomo cookies work in relation to the GDPR. And in this article we will show you how you can integrate Matomo into your cookie banner using the consentmanager cookie tool.
In just three steps we will guide you through all the necessary steps to securely use Matomo cookies on your website.
What is Matomo Analytics?
Matomo (formerly Piwik) is an analytics software that is open source and represents a GDPR-compliant alternative to Google Analytics for some users. The software is fully equipped with PHP/MySQL. One of Matomo’s main functions is tracking user interactions on your website, mobile apps and software applications.
The following explains how you can do this with the consentmanager CMP and how you can integrate it into your cookie banner.
How do I integrate Matomo Analytics into my cookie banner in compliance with the GDPR?
Step 1: Add Matomo to your provider list
First you need to add Matomo to your provider list. A provider is a company or tool that is used on your website and either sets cookies or processes personal data from users. Examples of this are Google Ads, Mailchimp and Facebook.
In your consentmanager dashboard, go to the “Providers” tab in the left sidebar.
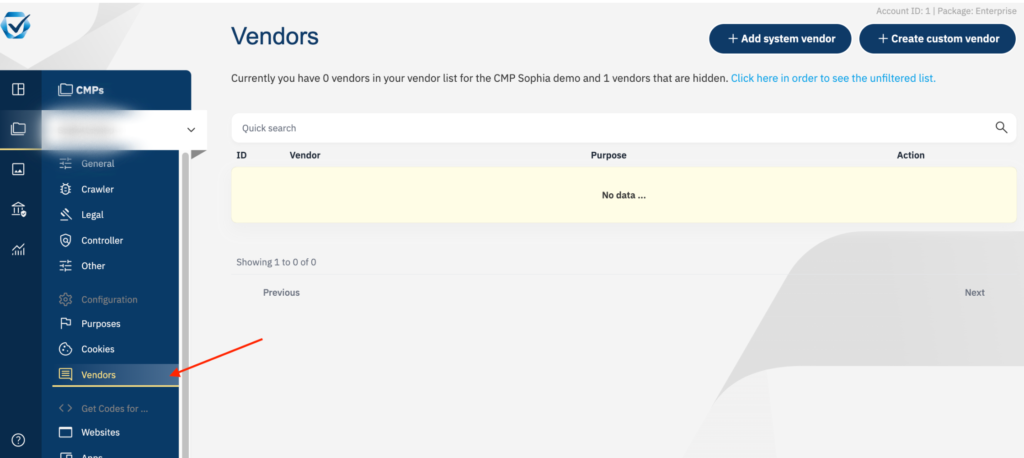
Then click on the “Add Provider” option in the top right corner of the page (see below).

Then search for “Matomo” in your search bar and click “Add Provider” on the right side of the list.

Now go back to your provider list by scrolling up and clicking “Back”.

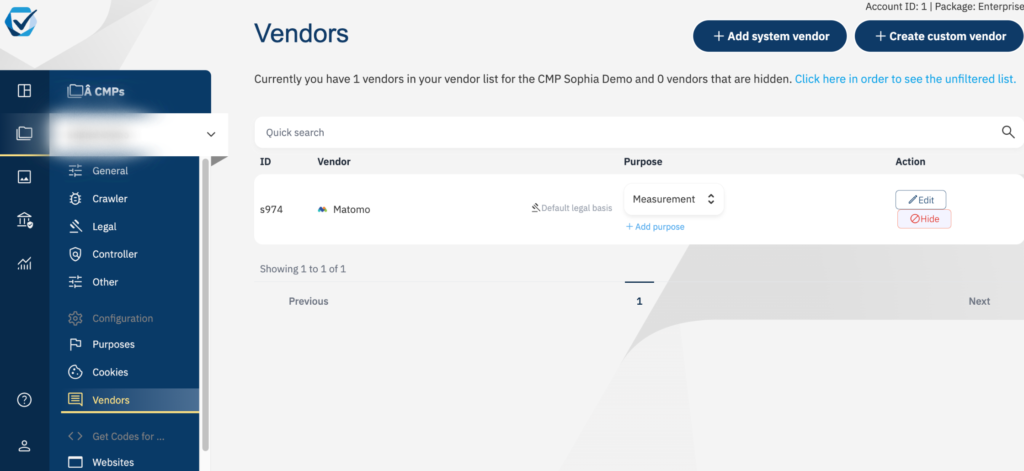
And the first step is done! As you can see below, you can now find Matomo in your provider list.

Step 2: Customize the service to suit your usage and legal basis
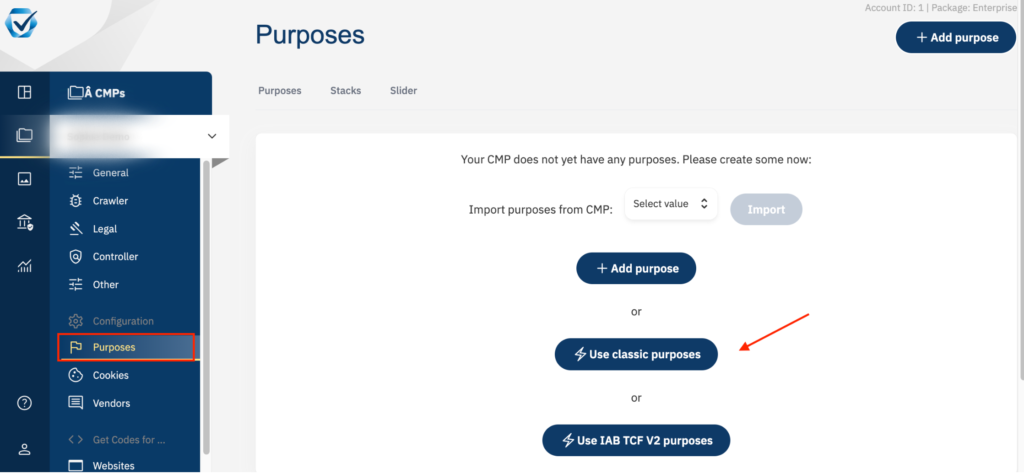
Now you can specify and define the purpose of this tool. To do this, simply click on the “Purposes” tab on the left side of your dashboard. Click on “Use classic purposes”.
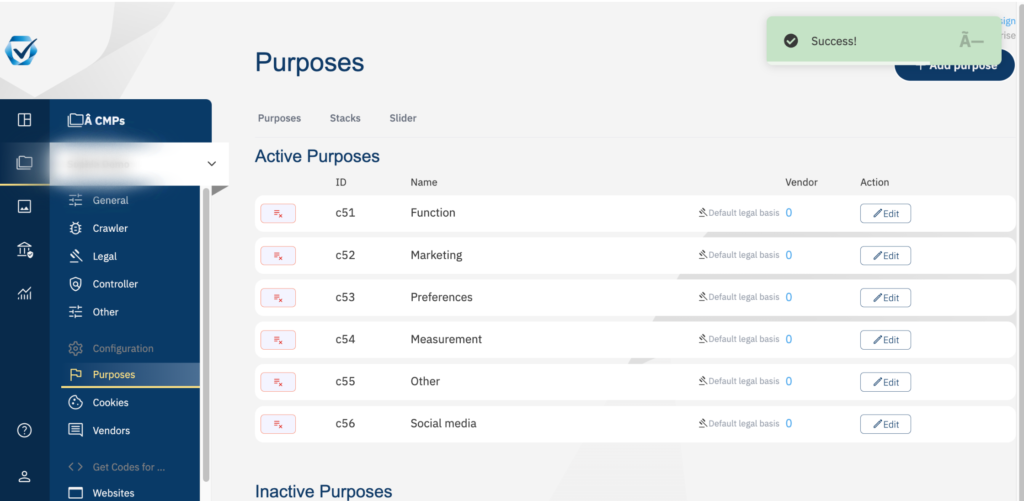
Almost finished! Your list should now look like this:
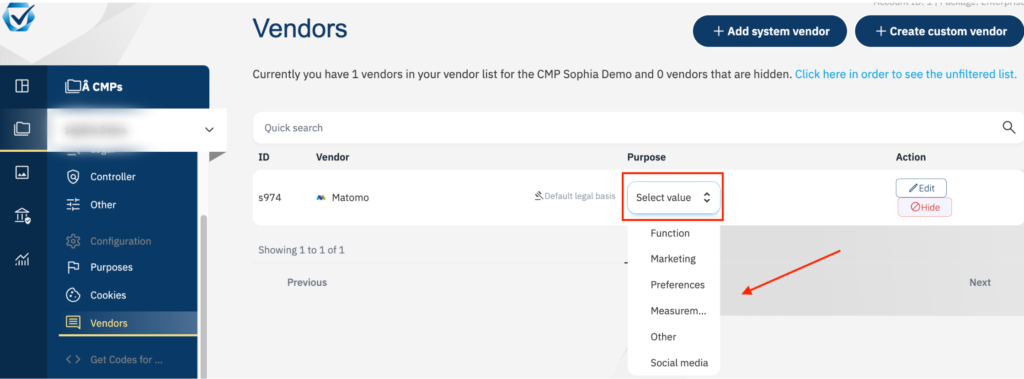
Now go back to your provider list and select the purpose of this service. You can select “Measurement”.
Step 3: Prepare scripts for the previous blocking
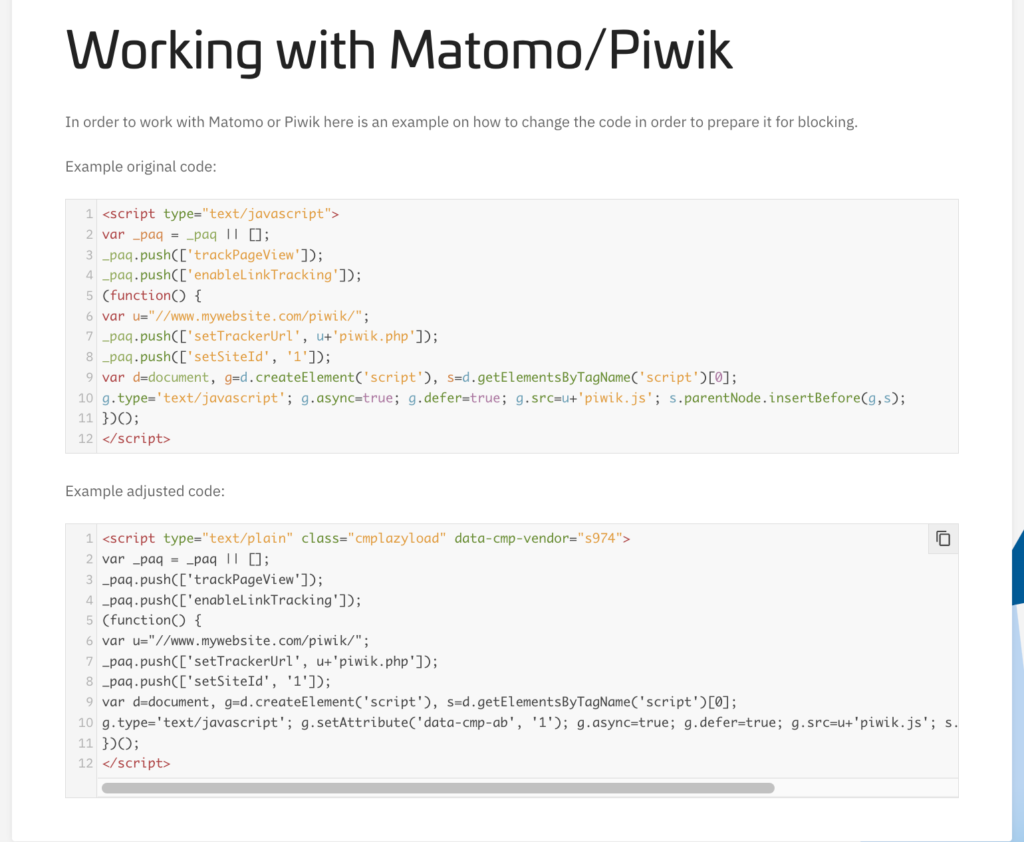
Finally, we will set up the pre-blocking of scripts. This is a simple adaptation to your code. Follow the example shown here → https://help.consentmanager.net/books/cmp/page/working-with-matomopiwik
Here is a screenshot of an example of the original code and the customized code after you have modified your code for the previous block.
Congratulations, you made it! You have completed the setup and can now be sure that the use of Matomo Analytics on your website is legally compliant.
Other articles you may be interested in:


